You have found or taken the perfect photo, but it doesn’t have the right size dimensions? We can help you.
If you want to convert a landscape photo to portrait, or in other words, a horizontal photo into a vertical photo, we’ve got you covered.
And most importantly, this method doesn’t involve any kind of stretching whatsoever, which is a mistake many people make and it inevitably results in quality issues.
Not a single pixel will be stretched – just duplicated.

Duplicate the top of the image
To make a horizontal image vertical, it needs to become taller than it is wide. You can do this by adding pixels on top of it. But where will these new pixels come from?
The new pixels will be duplicates of existing ones. You are going to scan the top of your photo for an area with little to no detail or variation (negative space) and duplicate it. In the picture below, we found the perfect block of negative space to duplicate.
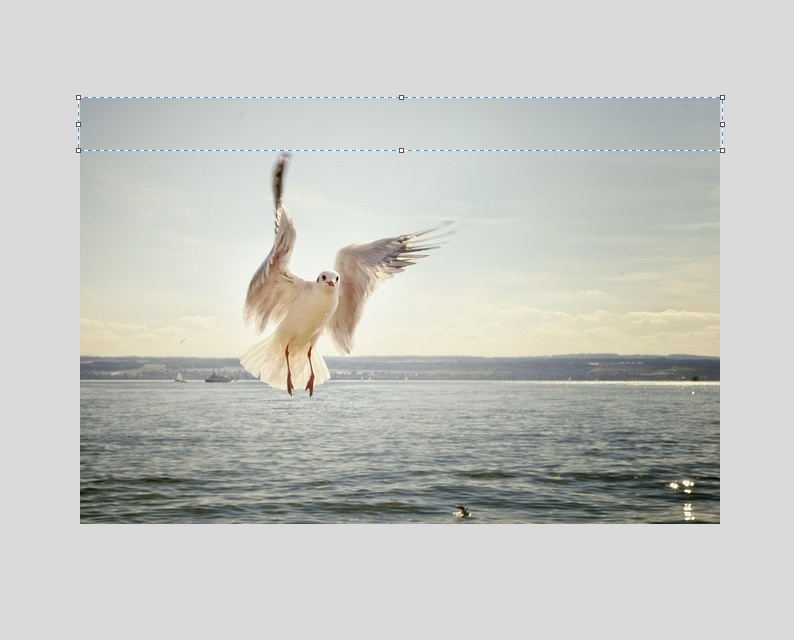
As you can see, there’s no detail or objects in the block we selected. It’s a wide open area with minimal variation. This means it won’t be obvious that we’ve made the image taller by stacking duplicated blocks.
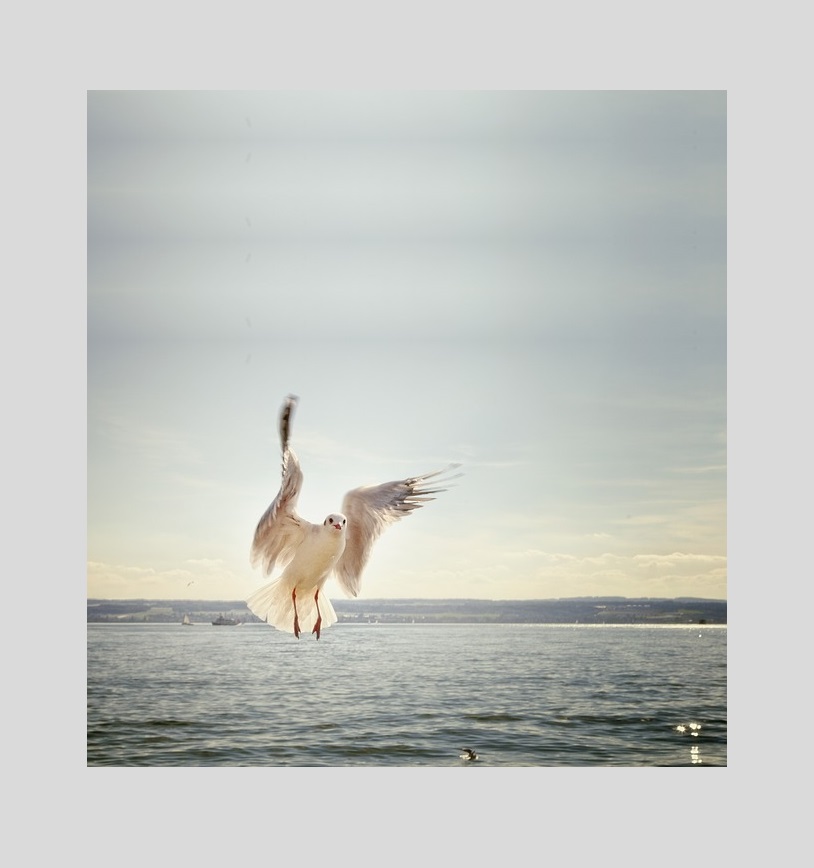
When stacking your blocks, you must remember to mirror the previous block (by flipping them vertically) to achieve a seamless finish, otherwise the block edges will be visible and it will give the game away.
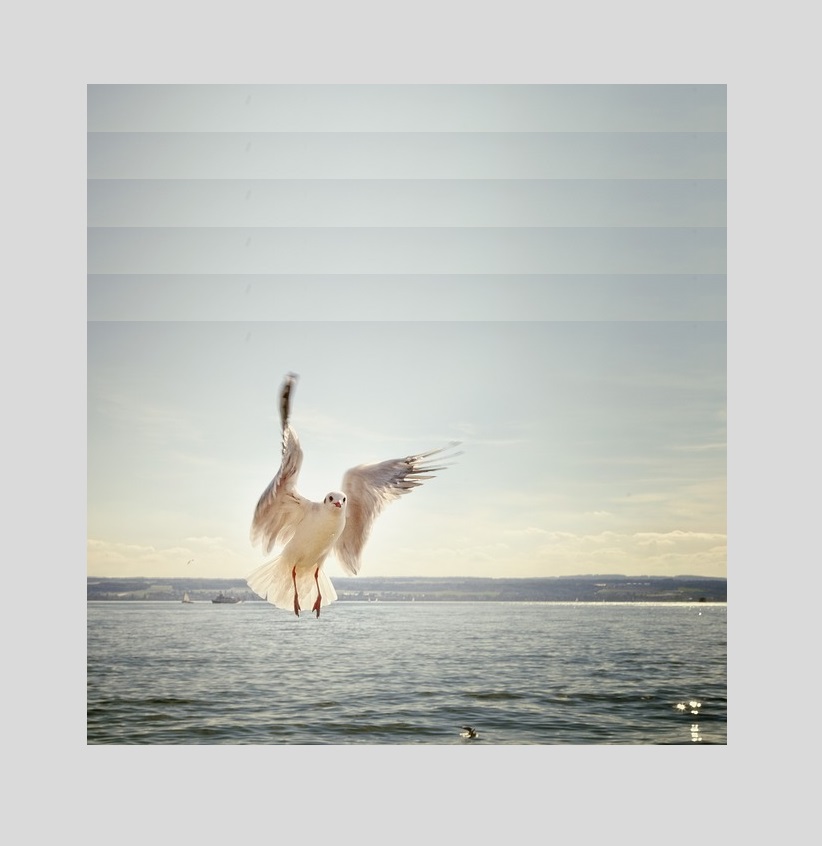
Just remember that the first block is always flipped, and then alternate blocks are flipped. How many blocks in total you will need in order to create a vertical photo depends on the size of the block, and the size of the block depends on the amount of negative space there is.

Also note that the negative space doesn’t have to be at the very top of the photo. It could be a little further down, in which case the first duplicate block(s) will replace the original pixels at the very top, such as the tree branches in this picture of Mount Fuji.

Duplicate the center of the image
Since the middle of your photos tend to be the busiest, it’s not often you’ll get the chance to find and duplicate negative space here. However, never say never.
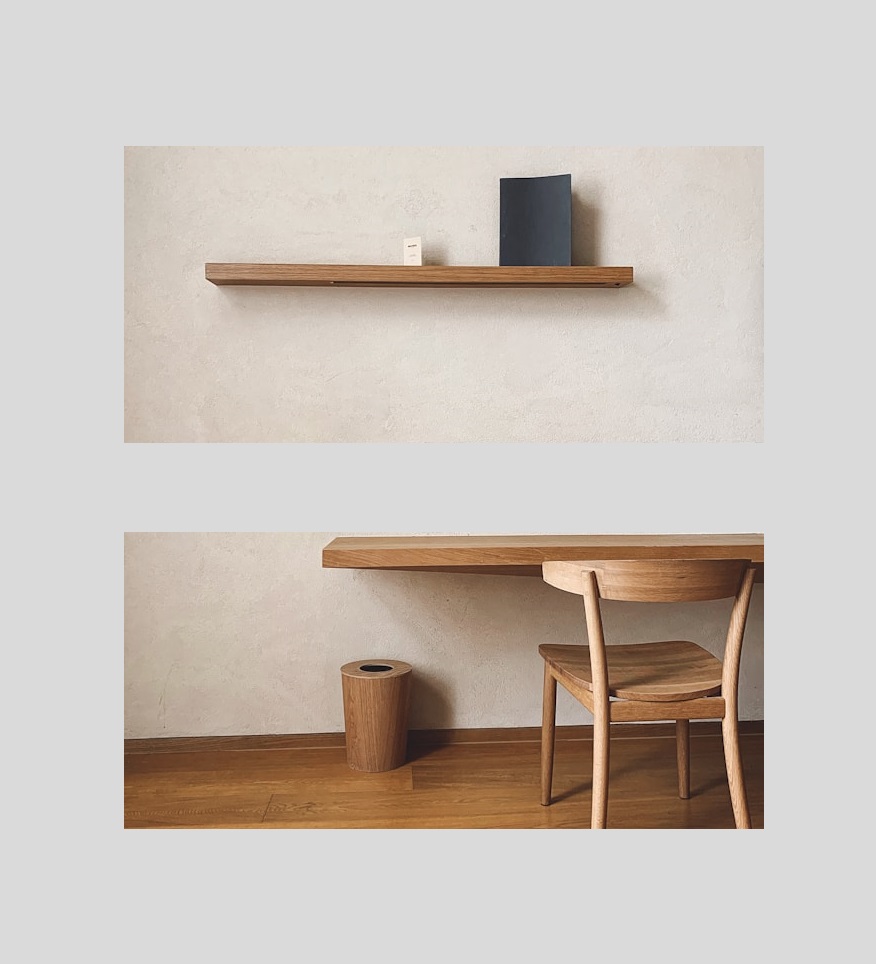
In this picture, there’s a wide open area between the desk and shelf. This means we can extend the image vertically by inserting a duplicate block in-between them.
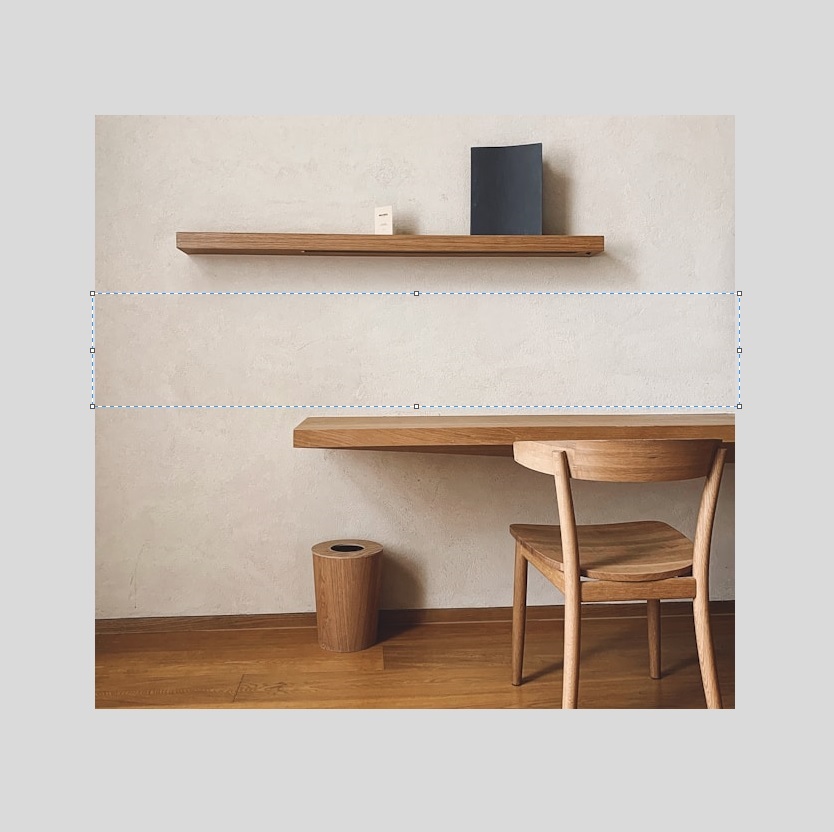
Firstly, we have to split the image into two parts to make room for our duplicate block, and then we can go ahead and follow the usual steps of copy and pasting and flipping.
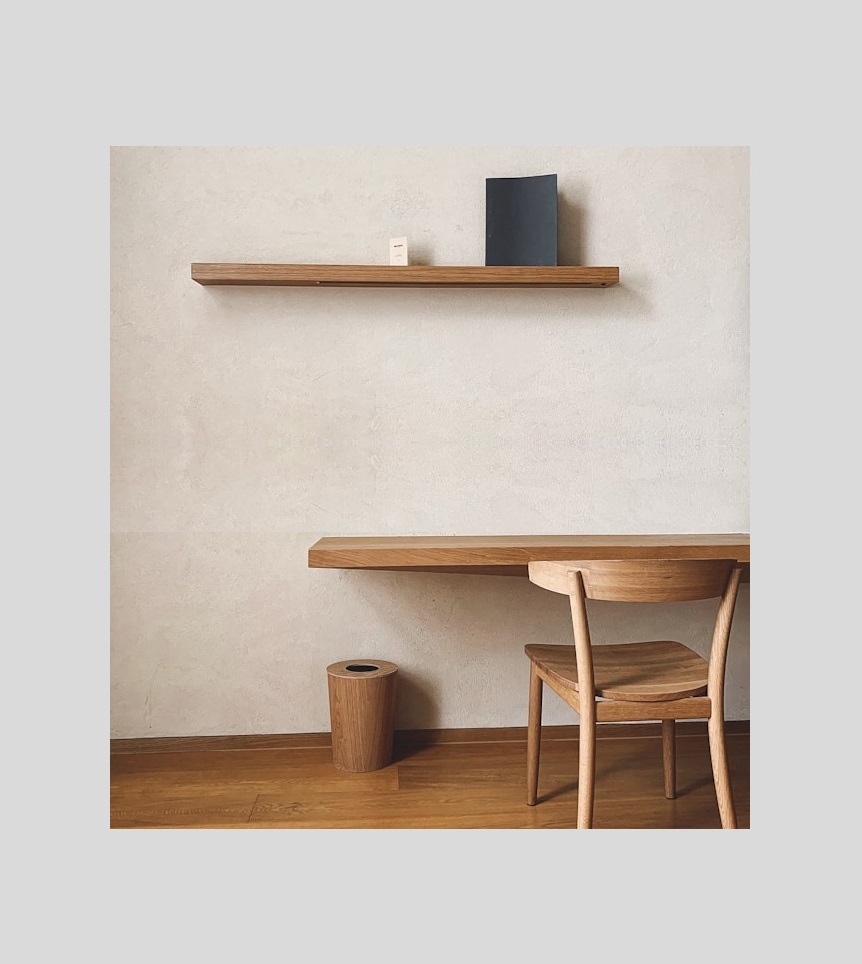
The trickiest thing about targeting the center is you have to join up the duplicate block with the rest of the image above and below. The more pure the negative space is, the easier it is to seamlessly slot in your block.
Duplicate the bottom of the image
If you can’t locate a block of negative space at the top of your image, then Plan B is to expand downwards.
The reason why this is a less desirable option is because it can negatively affect the sense of realism. When you look up at the sky, it looks and feels infinitely tall. But the ground is the ground. It’s neither up or down, so why would the ground expand downwards?
Nonetheless, you can expand downwards for a little while before things start to look awkward – we’re just merely pointing out that it’s something to be mindful of. And besides, if the ground or the floor isn’t visible in your photo, you have nothing to worry about.
So, let’s make a horizontal image into a vertical image by adding, stacking and flipping duplicated blocks on the bottom of it.
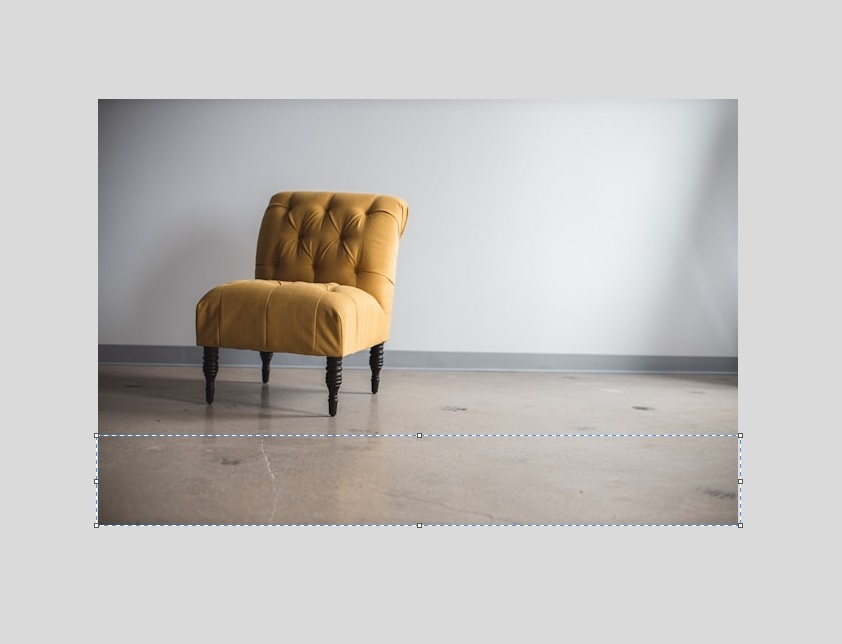
Although the negative space in this instance contains a little more detail and variation than is ideal, there’s nothing too distinctive so as to make the image look weird.
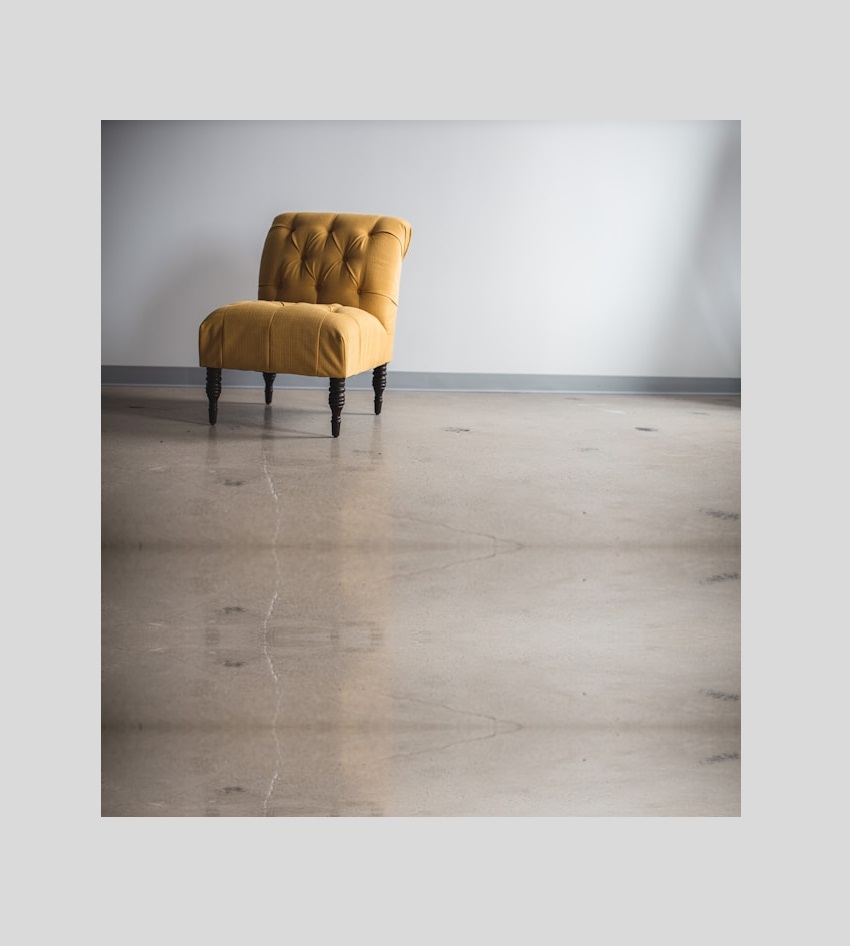
Copy and paste the block. Flip every other block. And Voila! We started with a horizontal photo and ended with a vertical one.
In theory you could expand up or down forever and that’s why this method is really useful for creating plenty of space on your photos for text (also called ‘copy’), which is a common practice in the design of posters, leaflets and Pinterest pins etc.
Summary
It’s possible to edit a horizontal photo so that it becomes vertical without doing any stretching.
The trick is to identify a block of negative space on the top, bottom or center of the photo and then copy and paste it to create duplicate blocks, which are then alternately flipped as you insert them.
Just keep stacking those blocks until your photo is vertical!